
See others in the series:
- Google Calendar Power User Tips
- Google Docs Power User Tips (this doc)
- Google Sheets Power User Tips
- Google Slides Power User Tips
Google Docs is the OG Google Workspace tool, and it’s evolved a lot since its inception. In the past few years, Google has releaed some very handy capabilities that aren’t very widely known yet. I also sometimes see some of the older features not being effectively utilized. So hopefully these tips, both new and old, will help you power up your Google Docs usage so you can make even better use of this awesome collaborative editor.
Table of Contents
- Use Pageless view unless you plan on printing your document
- Use Chips and Building Blocks to make docs more dynamic
- Create your own Building Blocks
- Use Header Styles
- Collaboratively Draft Emails
- Make your docs look good by default
- Change Capitalization Easily
Use Pageless view unless you plan on printing your document
Who prints documents onto dead trees nowadays? The vast majority of the time we create Google Docs just to view them on a monitor. So we should leverage the “Pageless” view of Google docs instead of using the “Print” view. Pageless documents don’t have the visual page breaks that can interrupt content flow and are only relevant if you need to know how content will be layed out when printing. Note: even in Pageless view, you can still print your document if necessary and the Print Preview mode will show you the page breaks.
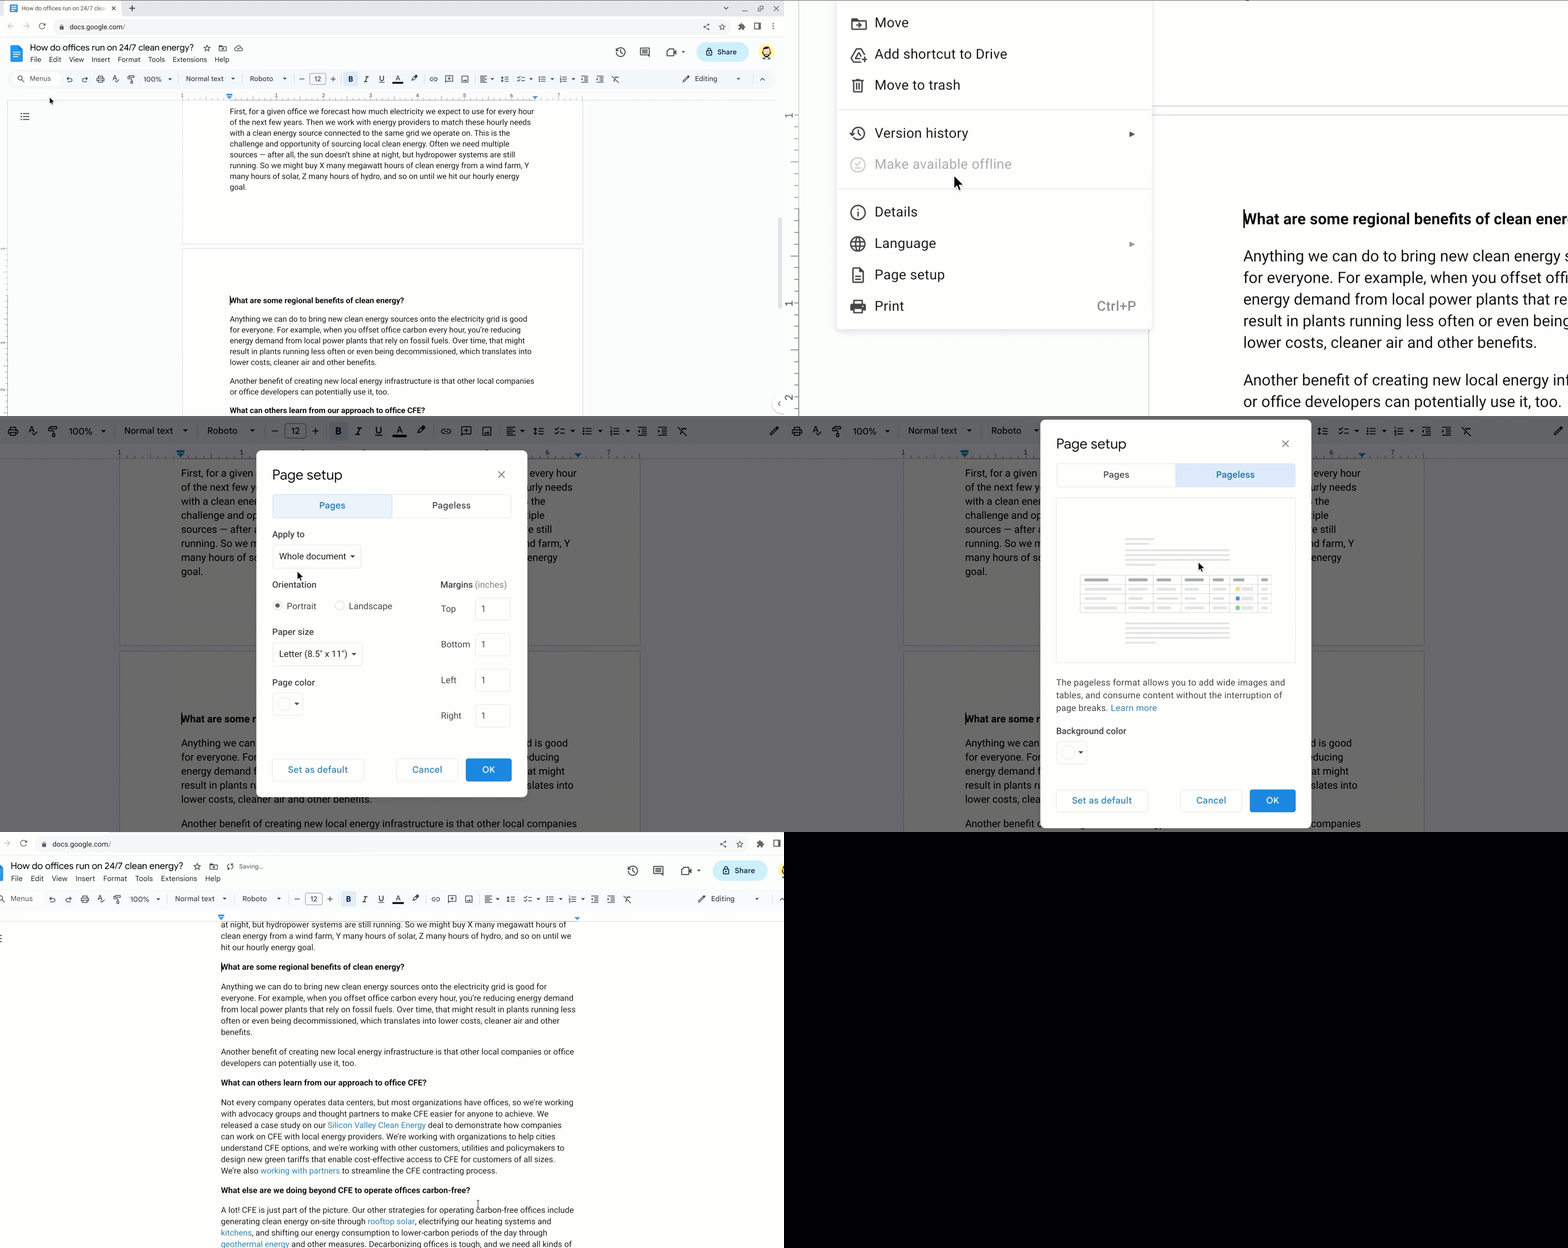
Switch to pageless view:
- Go to File > Page setup
- Click Pageless
- (bonus points) Set it as your default
Use Chips and Building Blocks to make docs more dynamic
Type @ and then select one of the provided options. My favorite ones are:
- Date - easily add dates like
@tomorrowor@todayor pick a specific date - Dropdown - use an existing dropdown or create a new custom one to track state or status
- Task - assign a task to someone
- Placeholder - when you know you need to add something but don’t have the value yet
- Variable - create custom variables and use them throughout your doc
- Voting - allow people to do emoji voting like in Slack
- Code block - for sharing small code snippets
- Emoji - type
:after the@to add an emoji
Create your own Building Blocks
If you find yourself reusing the same boilerplate, you can create your own custom building block. See https://support.google.com/docs/answer/13584759?hl=en
Use Header Styles
Separating documents using headers is an important way to organize content and make information easier to understand. Instead of manually styling headers (e.g., using bold and increasing the font size), use the OOTB Headers available from the style toolbar menu or Format > Paragraph Styles menu option.
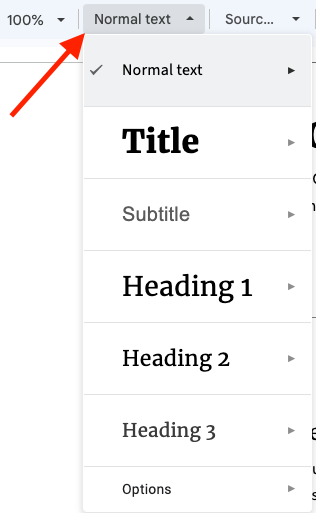
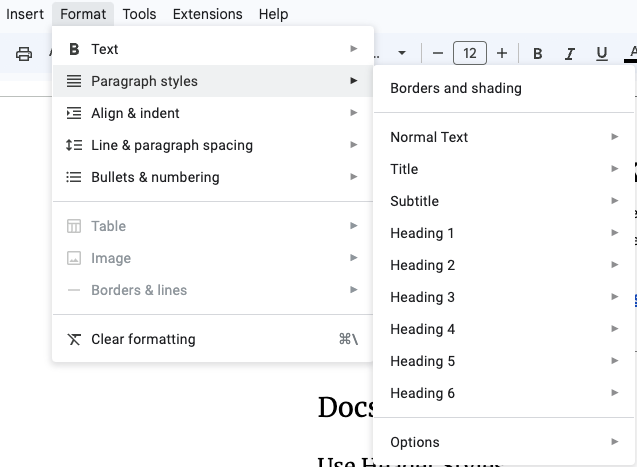
Using header styles has the following advantages:
- Speed - you can apply styles using keyboard shortcuts very quickly (e.g., ⌘+Command+1 for Header style 1, ⌘+Command+2 for Header style 2, etc )
- Consistency - all your headers will be styled similarly
- Direct linking - when you put your cursor on a header, the URL will update to provide a direct link that you can use to direct people to that specific part of your document
- Collapsing - content between two headers can be collapsed into the first header using the on-hover button that appears next to a header

Collaboratively Draft Emails
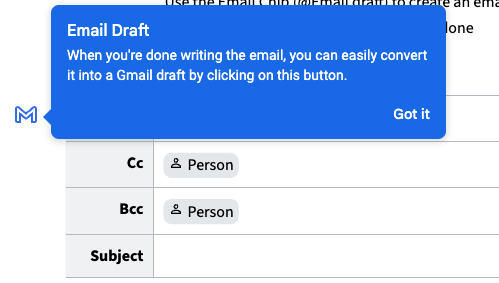
Use the Email Chip (@Email draft) to create an email inside a document. Share the document with others and draft it together. When you’re done, click the Gmail button and it will convert into a Draft Email that you can easily send.
Make your docs look good by default
Assuming you are using header styles, you can change how they look, and also change your body text, to make documents look better than the default Google style.
Create a new document with the different header levels and body text. See example.
Update the font, size, color, etc for the different headers and text. a. I use Merriweather for headers and Source Sans 3 for body text
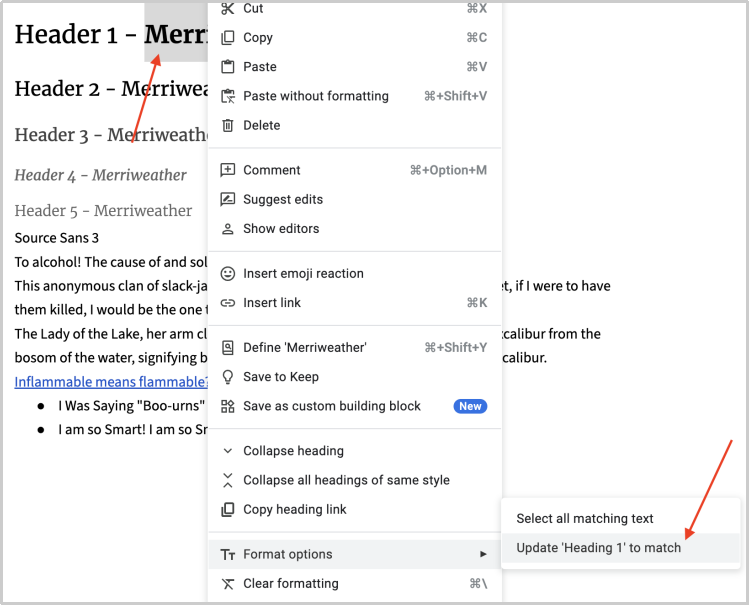
Select each heading or body text, right click and select Format options > Update ’[style name]’ to match
Once you’re done, go to the style menu > Options > Save as my default styles
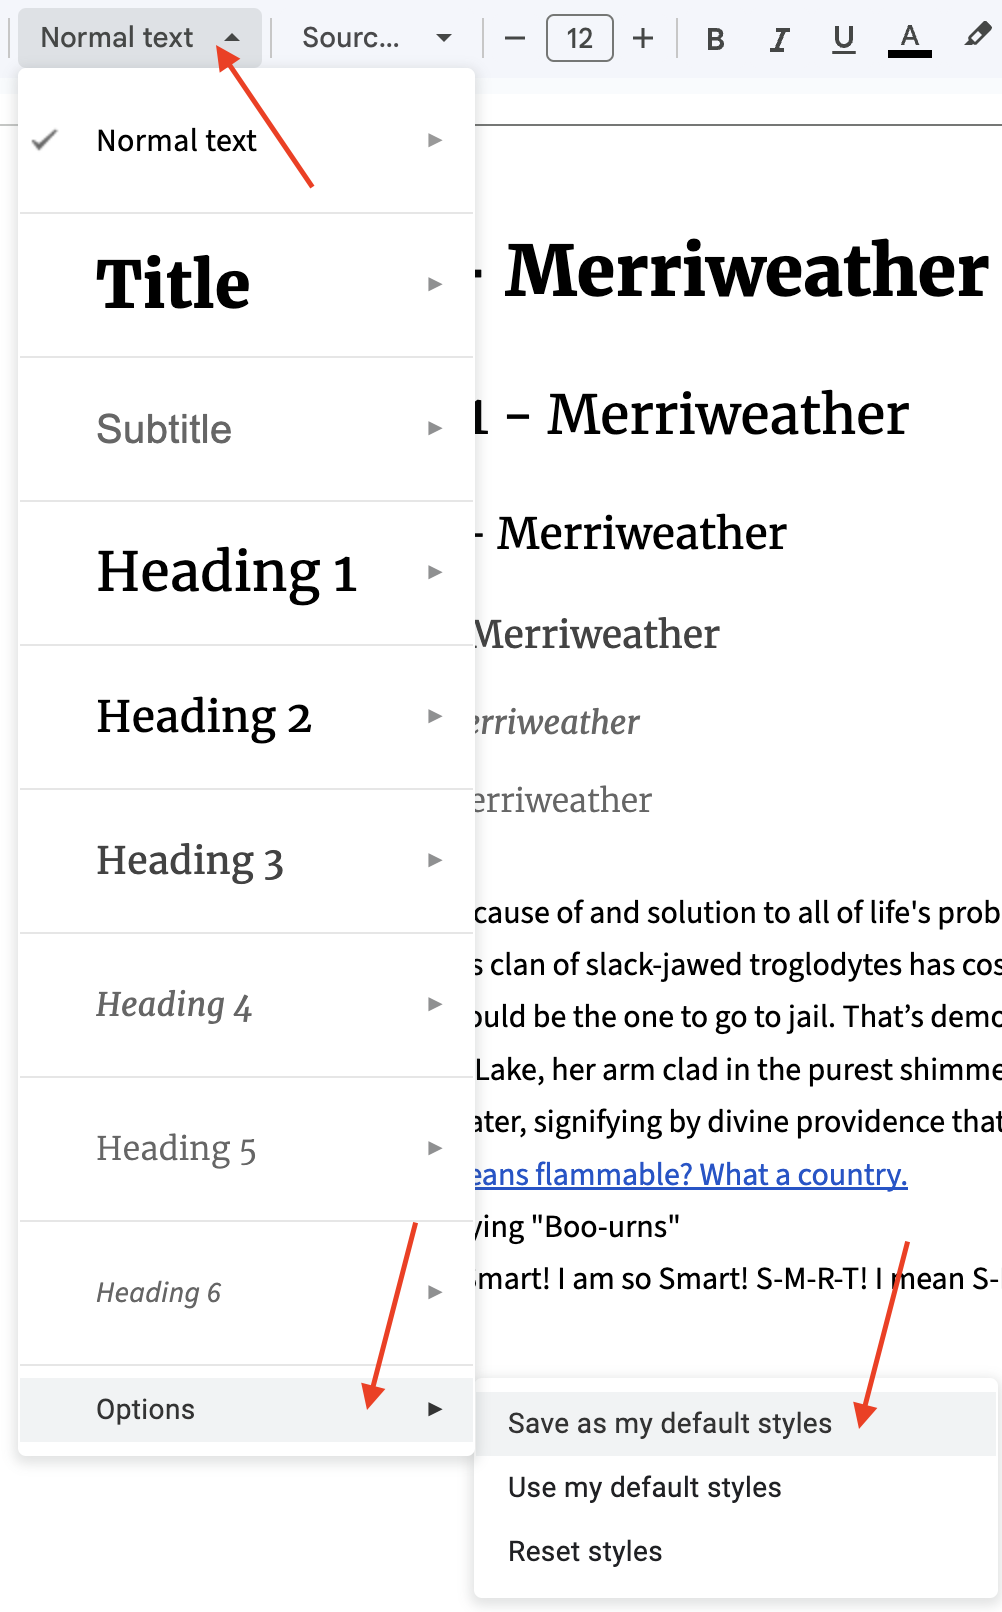
Now all new documents will use these styles
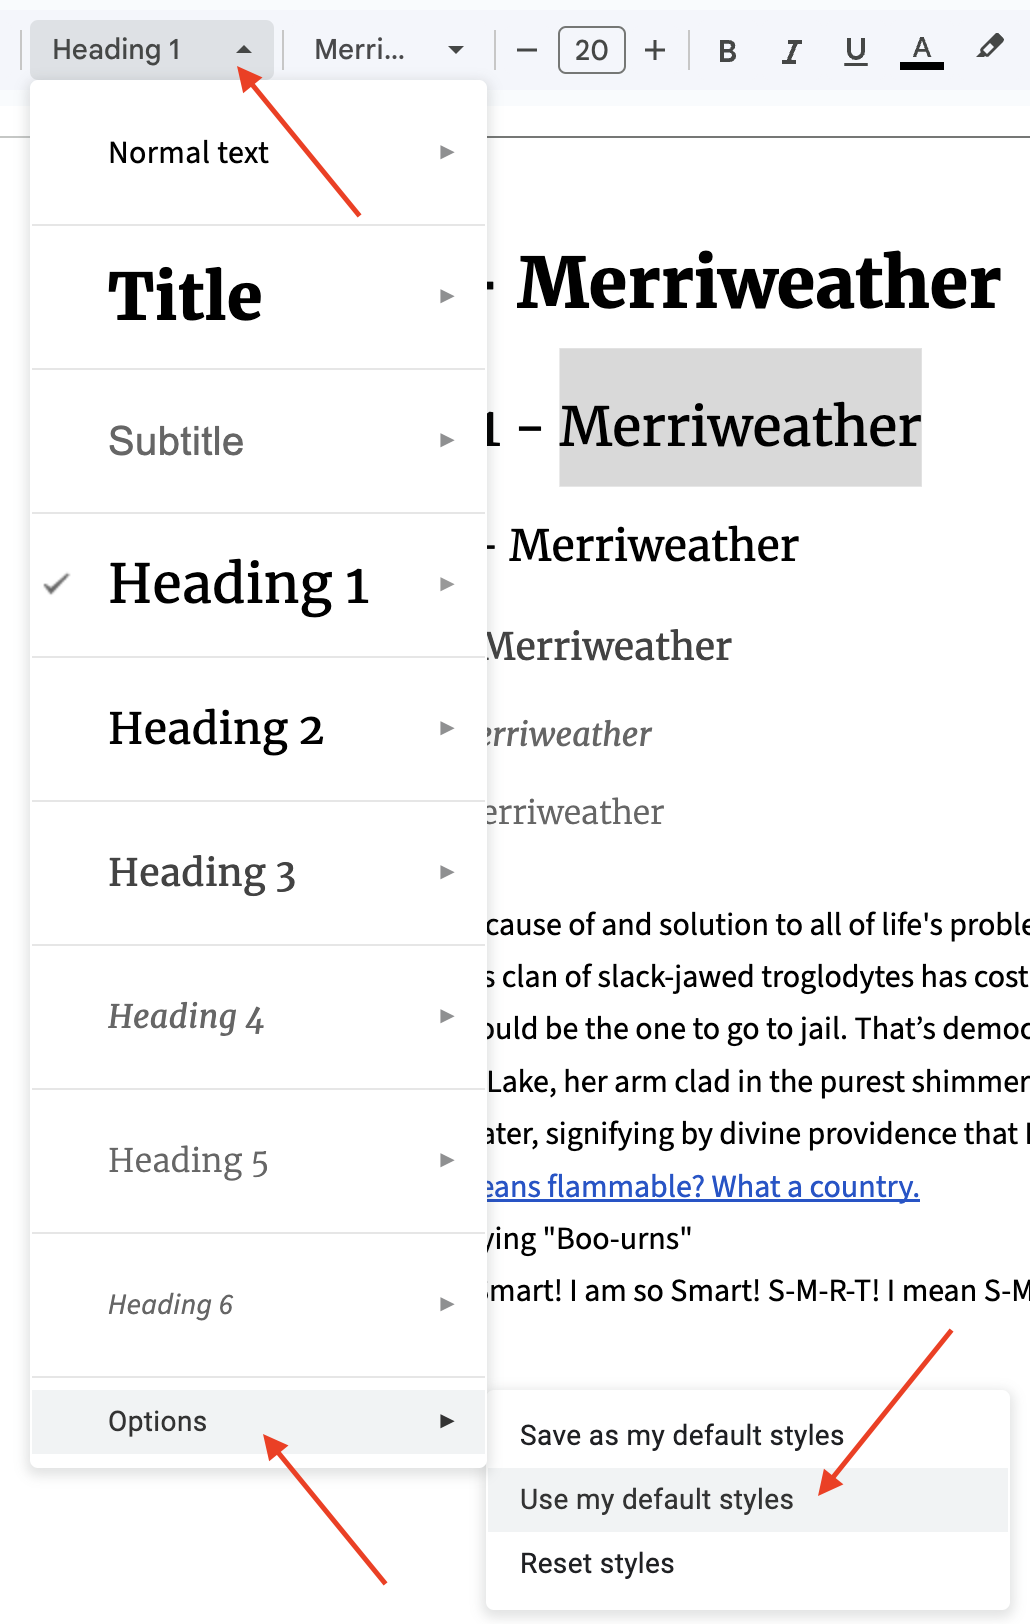
To update an existing document to use your styles, go to the style menu > Options > Use my default styles
Here are my default styles if you want to clone them: Jed’s Default Styles
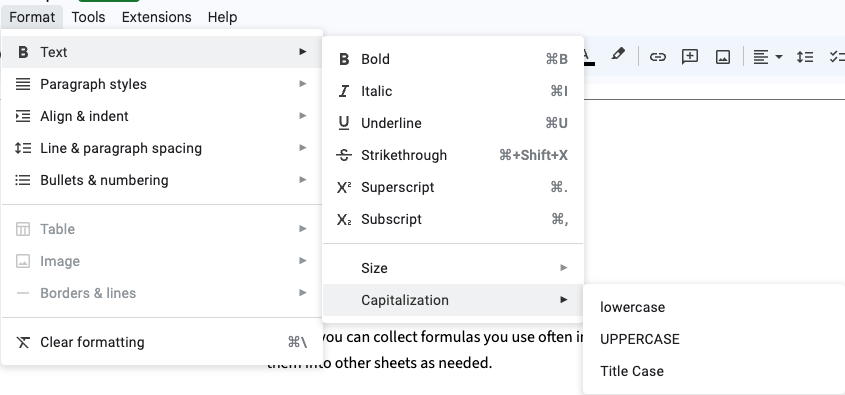
Change Capitalization Easily
If you need to convert a block of text to lowercase, uppercase or title case, there’s a buried option to do this easily in Format > Text > Capitalization:
Summary
I hope these tips help you make better use of Google Docs and make better looking Google Docs!