
I have a mind like a sieve, so I take a lot of notes for myself. I try to jot down notes on everything from important takeaways from great non-fiction books, like Decisive, to solutions to problems I’ve run into that I may run into again, like how to get the network scanner on my printer working.
After a while, the problem becomes how to organize and find things across your notes. I used to use Google Docs for everything, but ironically searching for things in Google Docs sucks and Google Docs doesn’t encourage any kind of organization, so your notes become a mess. Plus, where possible I’ve been trying to reduce my dependencies on Google.
At work, we have a great team of InfoDev writers who create and manage our product documentation, and I thought, I want something like that for myself. While creating a huge, super-professional documentation site for yourself is overkill, it turns out that you can easily create your own, free, private knowledge base site with minimal effort.
Here’s how it works: you will capture your knowlede base notes in Markdown files, which get turned into a searchable website by Docusaurus, and then are published privately on the web via Gitlab pages. Then you can access and search them from anywhere.
I’ll walk through each step, or you can just fork this project template and get started.
0. Version Control
This project requires rudimentary knowledge of version control, specifically Git. It doesn’t require advanced knowledge, but you should understand the basics of pulling, adding files, and pushing changes. If you’d prefer not to use the terminal, you can install a graphical version control (see list here).
1. Create a Gitlab account
We’re going to use Gitlab instead of Github because Gitlab allows you to create a private website. Only people you add as collaborators to the repository can access your knowledge base website.
If you don’t already have a Gitlab account, create one at https://gitlab.com/users/sign_up.
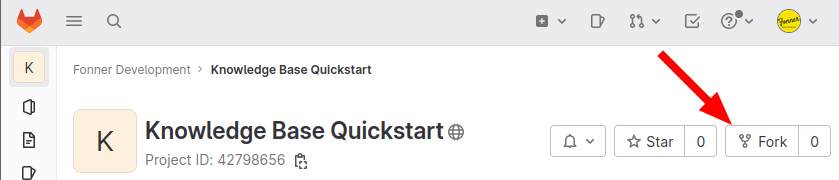
2. Fork the Knowledge Base Quickstart project
Go to my Knowledge Base Quickstart project and click the Fork button at the top right. This will create a project in your account this is all set up.
Rename the project to something of your liking, such as knowledgebase or simply kb. This will become the latter half of your knowledge base’s web url.
Open the docusaurus.config.js file and update the gitlabUser and gitlabProject variables to match your Gitlab account name and project name.
3. Configure Page Visibility
To keep your knowledge base private, you need to change the visibility of your Gitlab Pages site. Go to Settings > General and expand the “Visibility, project features, permissions” section of your project and change the visibility to “Only Project Members”.

4. Understand Docusaurus
The tool that will convert your notes into a nicely formatted, searchable website is called Docusaurus. When you make changes or add new notes, Gitlab runs Docusaurus to convert them into html pages for you. This usually takes about 3 minutes after you send your changes to Gitlab.
You can also run Docusaurus locally on your computer to preview the changes faster before sending them to Gitlab. This is explained in the quickstart project’s README file.
5. Add your notes
Now you’re ready to add your notes. Create a new file with the .md extension inside the /docs folder.
Notes are written in Markdown, which is a simple markup language that is easy to learn. If you’re not familiar with Markdown, read the Docusaurus Markdown page.
Each file will become a new page in your knowledge base site. You can organize pages into folders which will create page hierarchies.
The first line of each file should be a # followed by the title of the page. If no title is provided, then the file name will be used as the title on your site.
If you want to add images or documents (e.g., pdfs) to your knowledge base, create a folder called assets and add your images or documents to that folder. Then you can reference them locally inside your knowledge pages like assets/<name-of-asset>.ext.
6. Searchability
Search is powered by a plugin that runs whenever the knowledge base site is built by Gitlab. This means you can’t test search locally, but on your published site you can search for any contents on your page.
7. Publish your site
Once you’ve added some content, you can send your changes to Gitlab to have it build and publish your site. Open a terminal and run git push origin HEAD.
Your site will be ready in a few minutes. You will be able to access it at https://<your account name>.gitlab.io/<your project name>. You need to be logged into Gitlab otherwise you will get an Access Denied error.
8. Edit with preview
When you want to make a change to your knowledge base, you can edit them locally in any text editor or edit the files directly in Gitlab. On Gitlab, you can even preview your changes as you edit them and before publishing them using Gitlab’s Realtime Markdown Preview feature.
To enable the integration with Gitlab’s web-based IDE, you need to edit the editUrl line in docusaurus.config.js to point to your project’s Gitlab URL.