I’ve been running Emby locally within our network on an old mini-pc because I’ve found it’s the easiest and most user-friendly way to share media within a family. However, when you have it inside your network, it’s harder to access from your phone and you can’t hook it up to Amazon Alexa or Google Assistant.

I wanted to try hosting it externally to see if it would simplify things, but I couldn’t find a good resource on how to do this. I eventually got it working and figured I’d share how to do it in case it helps others.
However, if your main goal is to hook up your Emby to Amazon Alexa or Google Assistant, my recommendation is not to bother. The integration is cumbersome and buggy. Alexa mostly works but Google Assistant doesn’t work well at all with Emby. Maybe in another year or so it’ll be ready.
Step 1: Get yourself a domain name
You’ll need a domain in order to run Emby securely (aka with https). I use Cloudflare and they’re pretty good. You can get a domain for $10/year. I recommend getting a domain name that’s easy to remember and that you’ll want to use for a long time. You’ll end up making your Emby server a subdomain, like emby.jedfonner.com. If you already have a domain, you can use that without creating a new one.
UPDATE: Since posting this, I've discovered that Cloudflare Tunnels are an alternative to actually hosting Emby on a server in the cloud. Follow the Set up your first tunnel docs on the Cloudflare Tunnel site. Using a Cloudflare Tunnel means you can skip steps 2, 3, 4, and 7 below.
This worked great for exposing my local server to the internet.The only issue I ran into is that for some reason, the tunnel doesn't work if I map https to localhost:443, but it does work if I map http to localhost:80 and then configure Emby to handle https via a reverse proxy.
Step 2: Get yourself a cloud server
There are lots of options here: Linode, Hetzner, DigitalOcean, Amazon EC2, etc. I went with DigitalOcean because it’s very simple to create a cheap server which they call a “droplet”. I created a \$5/month server with 1GB of RAM and 25GB of storage. You can get a $200, 60-day credit if you use my referral link.
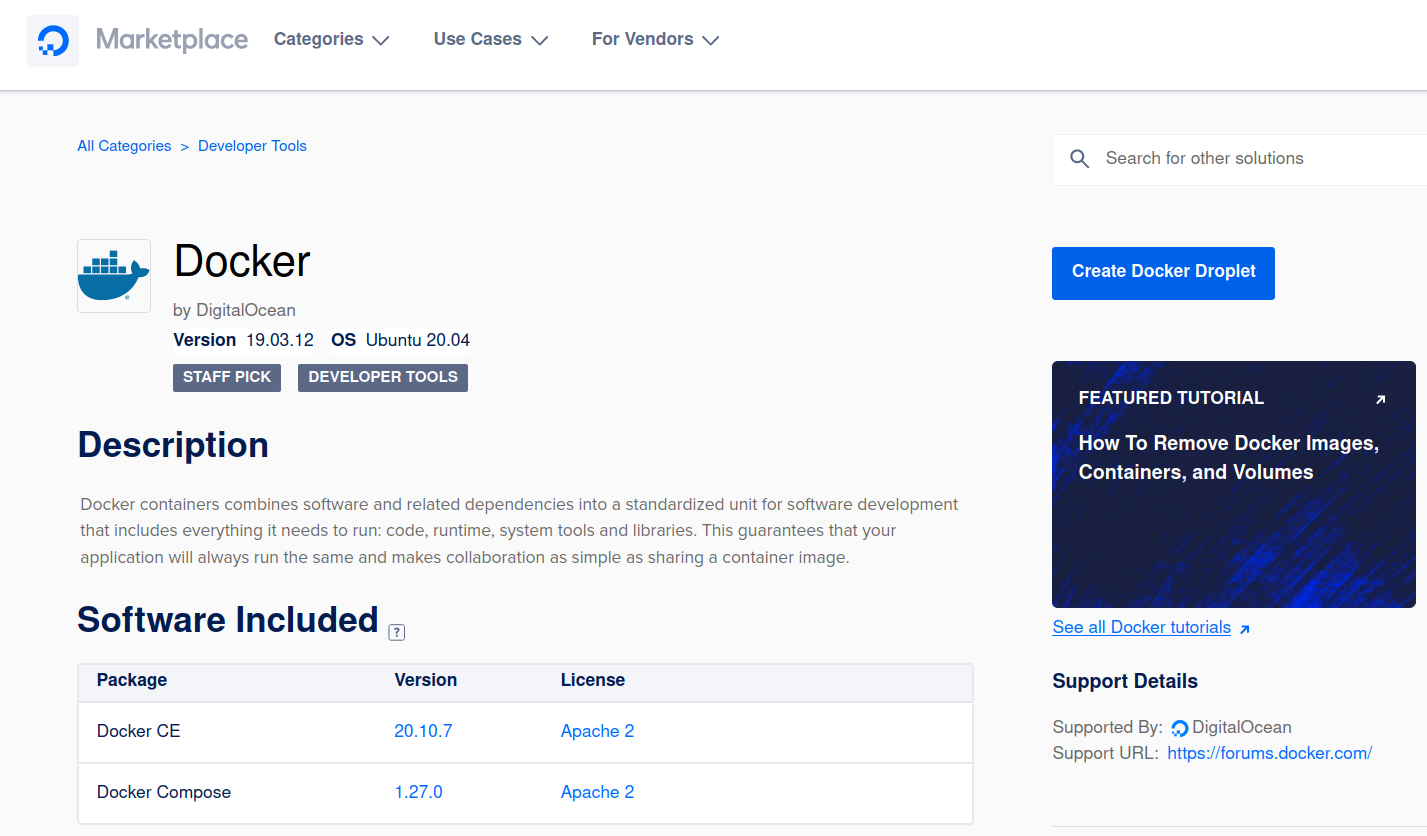
I selected the Docker on Ubuntu version to make things simpler:
Once your server starts, copy the static IP of your server because you’ll need that in the next step.
Step 3: Update your subdomain
Go to your domain registrar and create a subdomain for your Emby server called emby and point it to the IP address of your DigitalOcean droplet. If you’re using Cloudflare, you can do this by going to the DNS tab and adding a new A record.
Step 4: Install Emby
Ssh into your droplet using root as the username and your DigitalOcean password.
On the server, create a new emby folder at the root level, and create three sub folders: config, media, and keys. The first will be used by Emby to persist configuration settings, the second for your media, and the last will be used to store your SSL certificates.
To install the Emby docker image, follow these steps:
First, run the following to get the Emby docker image:
docker pull emby/embyserver:latestThen run the following to start the Emby docker image:
docker run -d --name embyserver --restart unless-stopped --volume /emby/config:/config --volume /emby/keys:/keys --volume /emby/media:/media --device /dev/dri/card0 --publish 8096:8096 --publish 443:443 --env UID=0 --env GID=0 emby/embyserver:latest
Note: in the future, if you need to upgrade your Emby software version, you can just run:
docker pull emby/embyserver:latestStep 5: Make it secure
To ensure that we can access Emby via the https port (443) and not just over insecure http (8096), we need to create a certificate. We could create a self-signed certificate, but it’s worth the effort to get a legit cert that won’t trigger certificate warnings. We’ll use Let’s Encrypt to get a free certificate.
To get a cert from Let’s Encrypt, we need to install the Certbot client and a web server. Certbot will expose an html page via the web server on your server and then Let’s Encrypt will confirm you own the subdomain by checking the html page. Once that’s done, Certbot will create a certificate and install it on your server.
Install the web server nginx:
sudo apt install nginxInstall certbot:
sudo apt install certbotConfirm nginx is running:
systemctl status nginxUpdate the firewall (UFW) to allow Nginx to expose webpages:
sudo ufw allow 'Nginx HTTP'Run certbox:
sudo certbot certonly -d <your subdomain>- when asked, choose 2 and select
/var/www/htmlwhich is the web root for nginx - this will generate a series of files in
/etc/letsencrypt/live/<your subdomain>/but Emby needs a “p12” (aka pkcs12) file. We’ll create that next.
- when asked, choose 2 and select
cdto the directory with your new Let’s Encrypt keysCreate a pkcs file:
openssl pkcs12 -export -in fullchain.pem -inkey privkey.pem -out /emby/keys/domain.pfx
Step 6: Configure Emby
Navigate to your subdomain on its insecure port 8096 using http, like http://emby.jedfonner.com:8096. You’ll be prompted to create an admin account. Once you’ve done that, you’ll be prompted to configure your server. When it asks where to store its config files, select /config and when it asks where the Library is for your media, select /media (these match the 2nd part of the --volume flags we passed when we started the docker image).
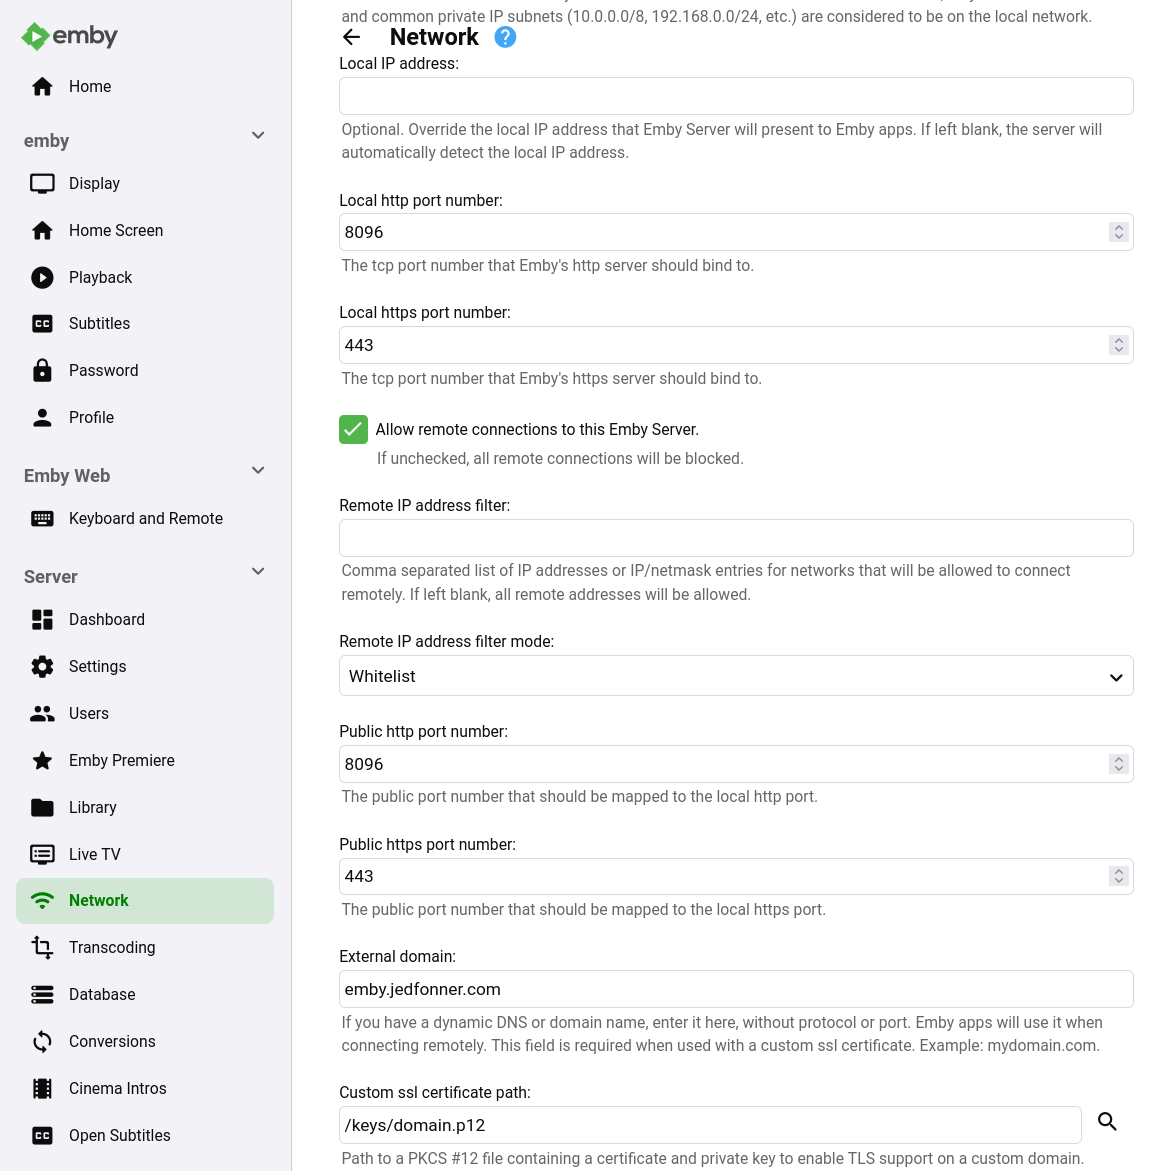
Next set the following Network settings:
- Update both the “Local https port number” and “Public https port number” to 443
- Update the “External domain” to point to your subdomain
- For the “Custom ssl certificate path”, select the p12 file at
/keys/domain.pfx - For “Secure connection mode”, select “Preferred, but not required”
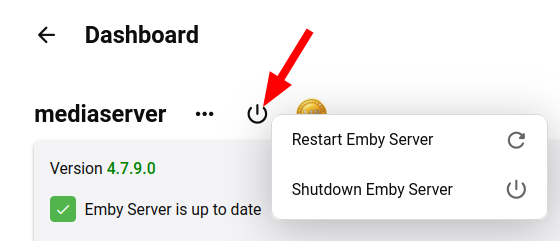
Restart the Emby server by clicking the Power icon at the top of the Server dashboard and selecting “Restart Emby Server”.
Now check that you can access your Emby server over https at https://<your subdomain>/
Step 7: Set up your DigitalOcean firewall
We really only want the secure, https (443) port accessible to the outside world. We could turn off insecure http access in Emby, but if you have a problem with the cert later, you may want the insecure port available.
So let’s use a DigitalOcean Firewall to block all ports except 443. Go to the DigitalOcean dashboard and select Networking > Firewall. Create a new firewall and name it something like “EmbyFirewall”. Add “SSH” and “HTTPS”.
Select your droplet to apply it and then click “Create Firewall”.
If you ever need to access the insecure port on your Emby server, you can turn off the Firewall and it will become available.
Step 8: Set up automatic renewal of your certificate
Let’s Encrypt certificates expire after 90 days. We need to set up a cron job to automatically renew the certificate. We’ll use certbot to do this. Run crontab -e and add the following line:
0 0 * * * /usr/bin/certbot renew --quietStep 9: Transfer your media
Install FileZilla and connect to your server using the IP address and the root username. Copy your media to the /emby/media folder. Then tell Emby to rescan the Library and you should see your media become available.
Conclusion
That’s it. You should now have a secure Emby server that is accessible from the outside world!
If you are a masochist, you can try connecting your Emby to Alexa or Google Assistant. Be warned that it requires an Emby Premiere license and you have to add the email address associated with your Emby Premiere account to the main user on your Emby server. Then you can follow the steps on the Emby wiki for Alexa or Google Assistant. I wasted a ton of time trying to get this to work, and even after everything was set up, the Emby skills were so bad that I determined it wasn’t worth it. YMMV.